# Hardware Setup
## Camera configuration
Run `rd list_devices` to detect all connected cameras and generate a starter `~/.config/raiden/camera.json`. Edit it to assign the correct `role` to each camera (`"scene"`, `"left_wrist"`, or `"right_wrist"`):
```json
{
"scene_camera": {"serial": 37038161, "type": "zed", "role": "scene"},
"left_wrist_camera": {"serial": 16522755, "type": "zed", "role": "left_wrist"},
"right_wrist_camera":{"serial": 14932342, "type": "zed", "role": "right_wrist"}
}
```
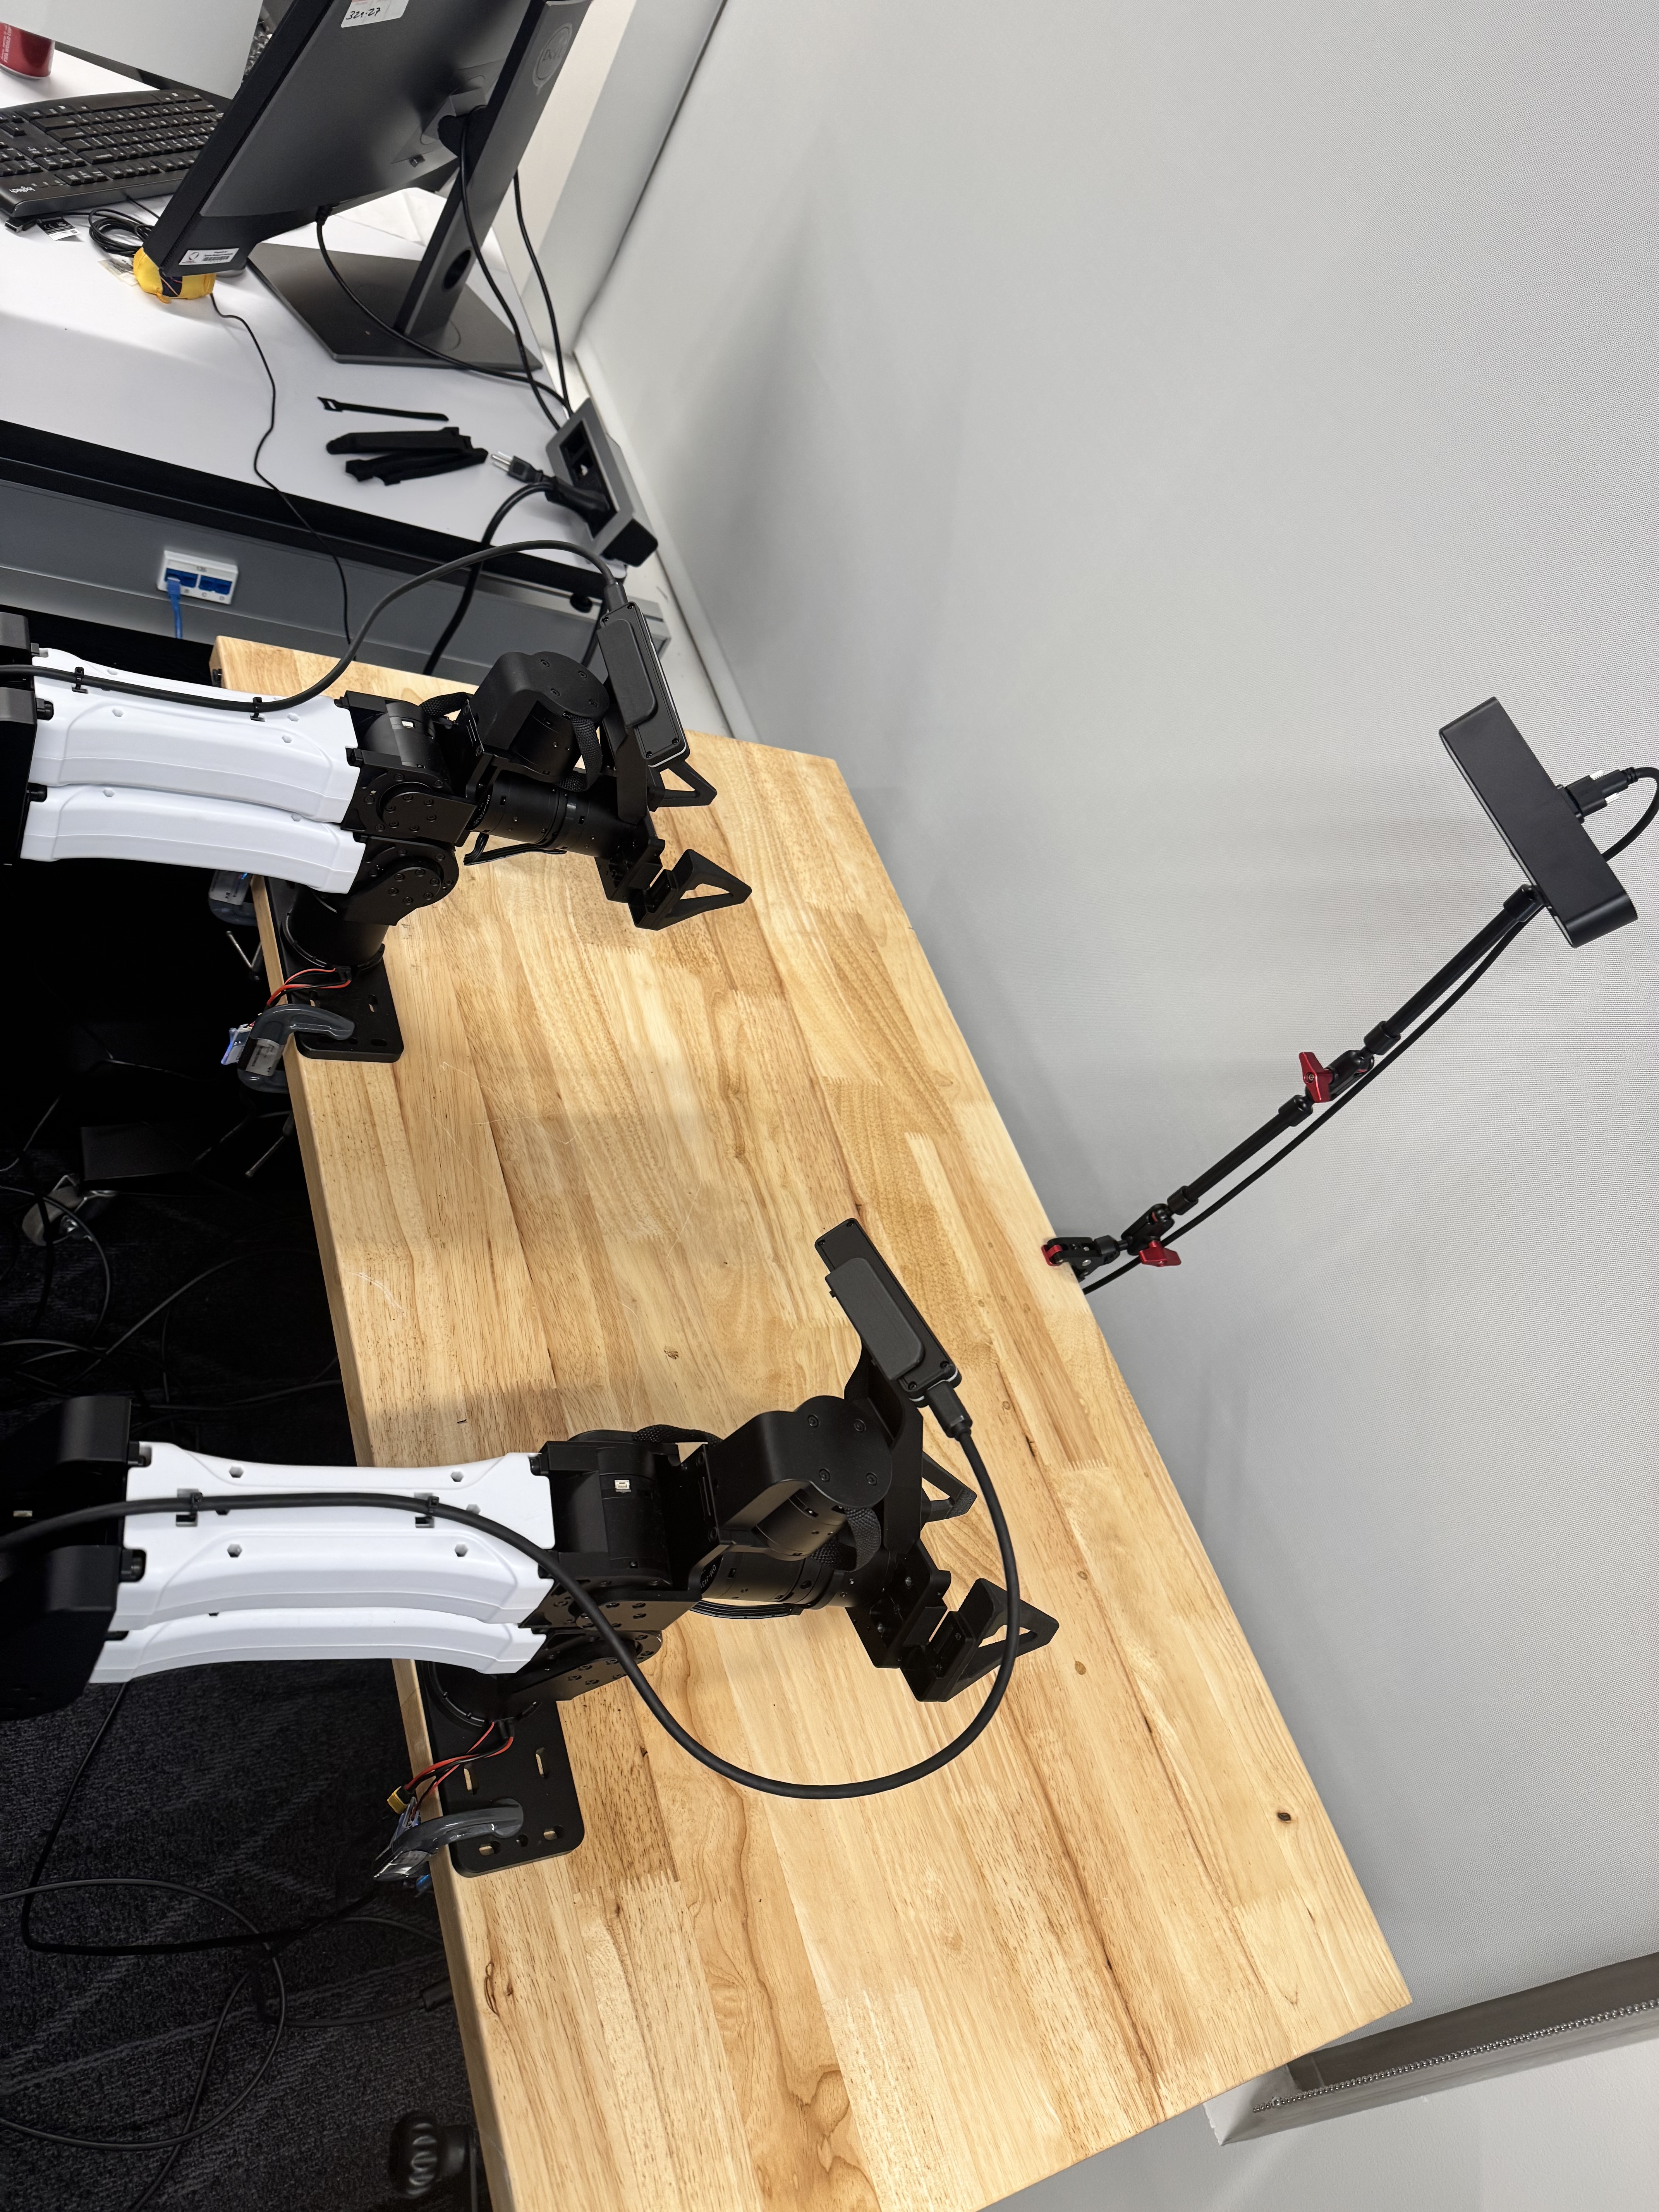
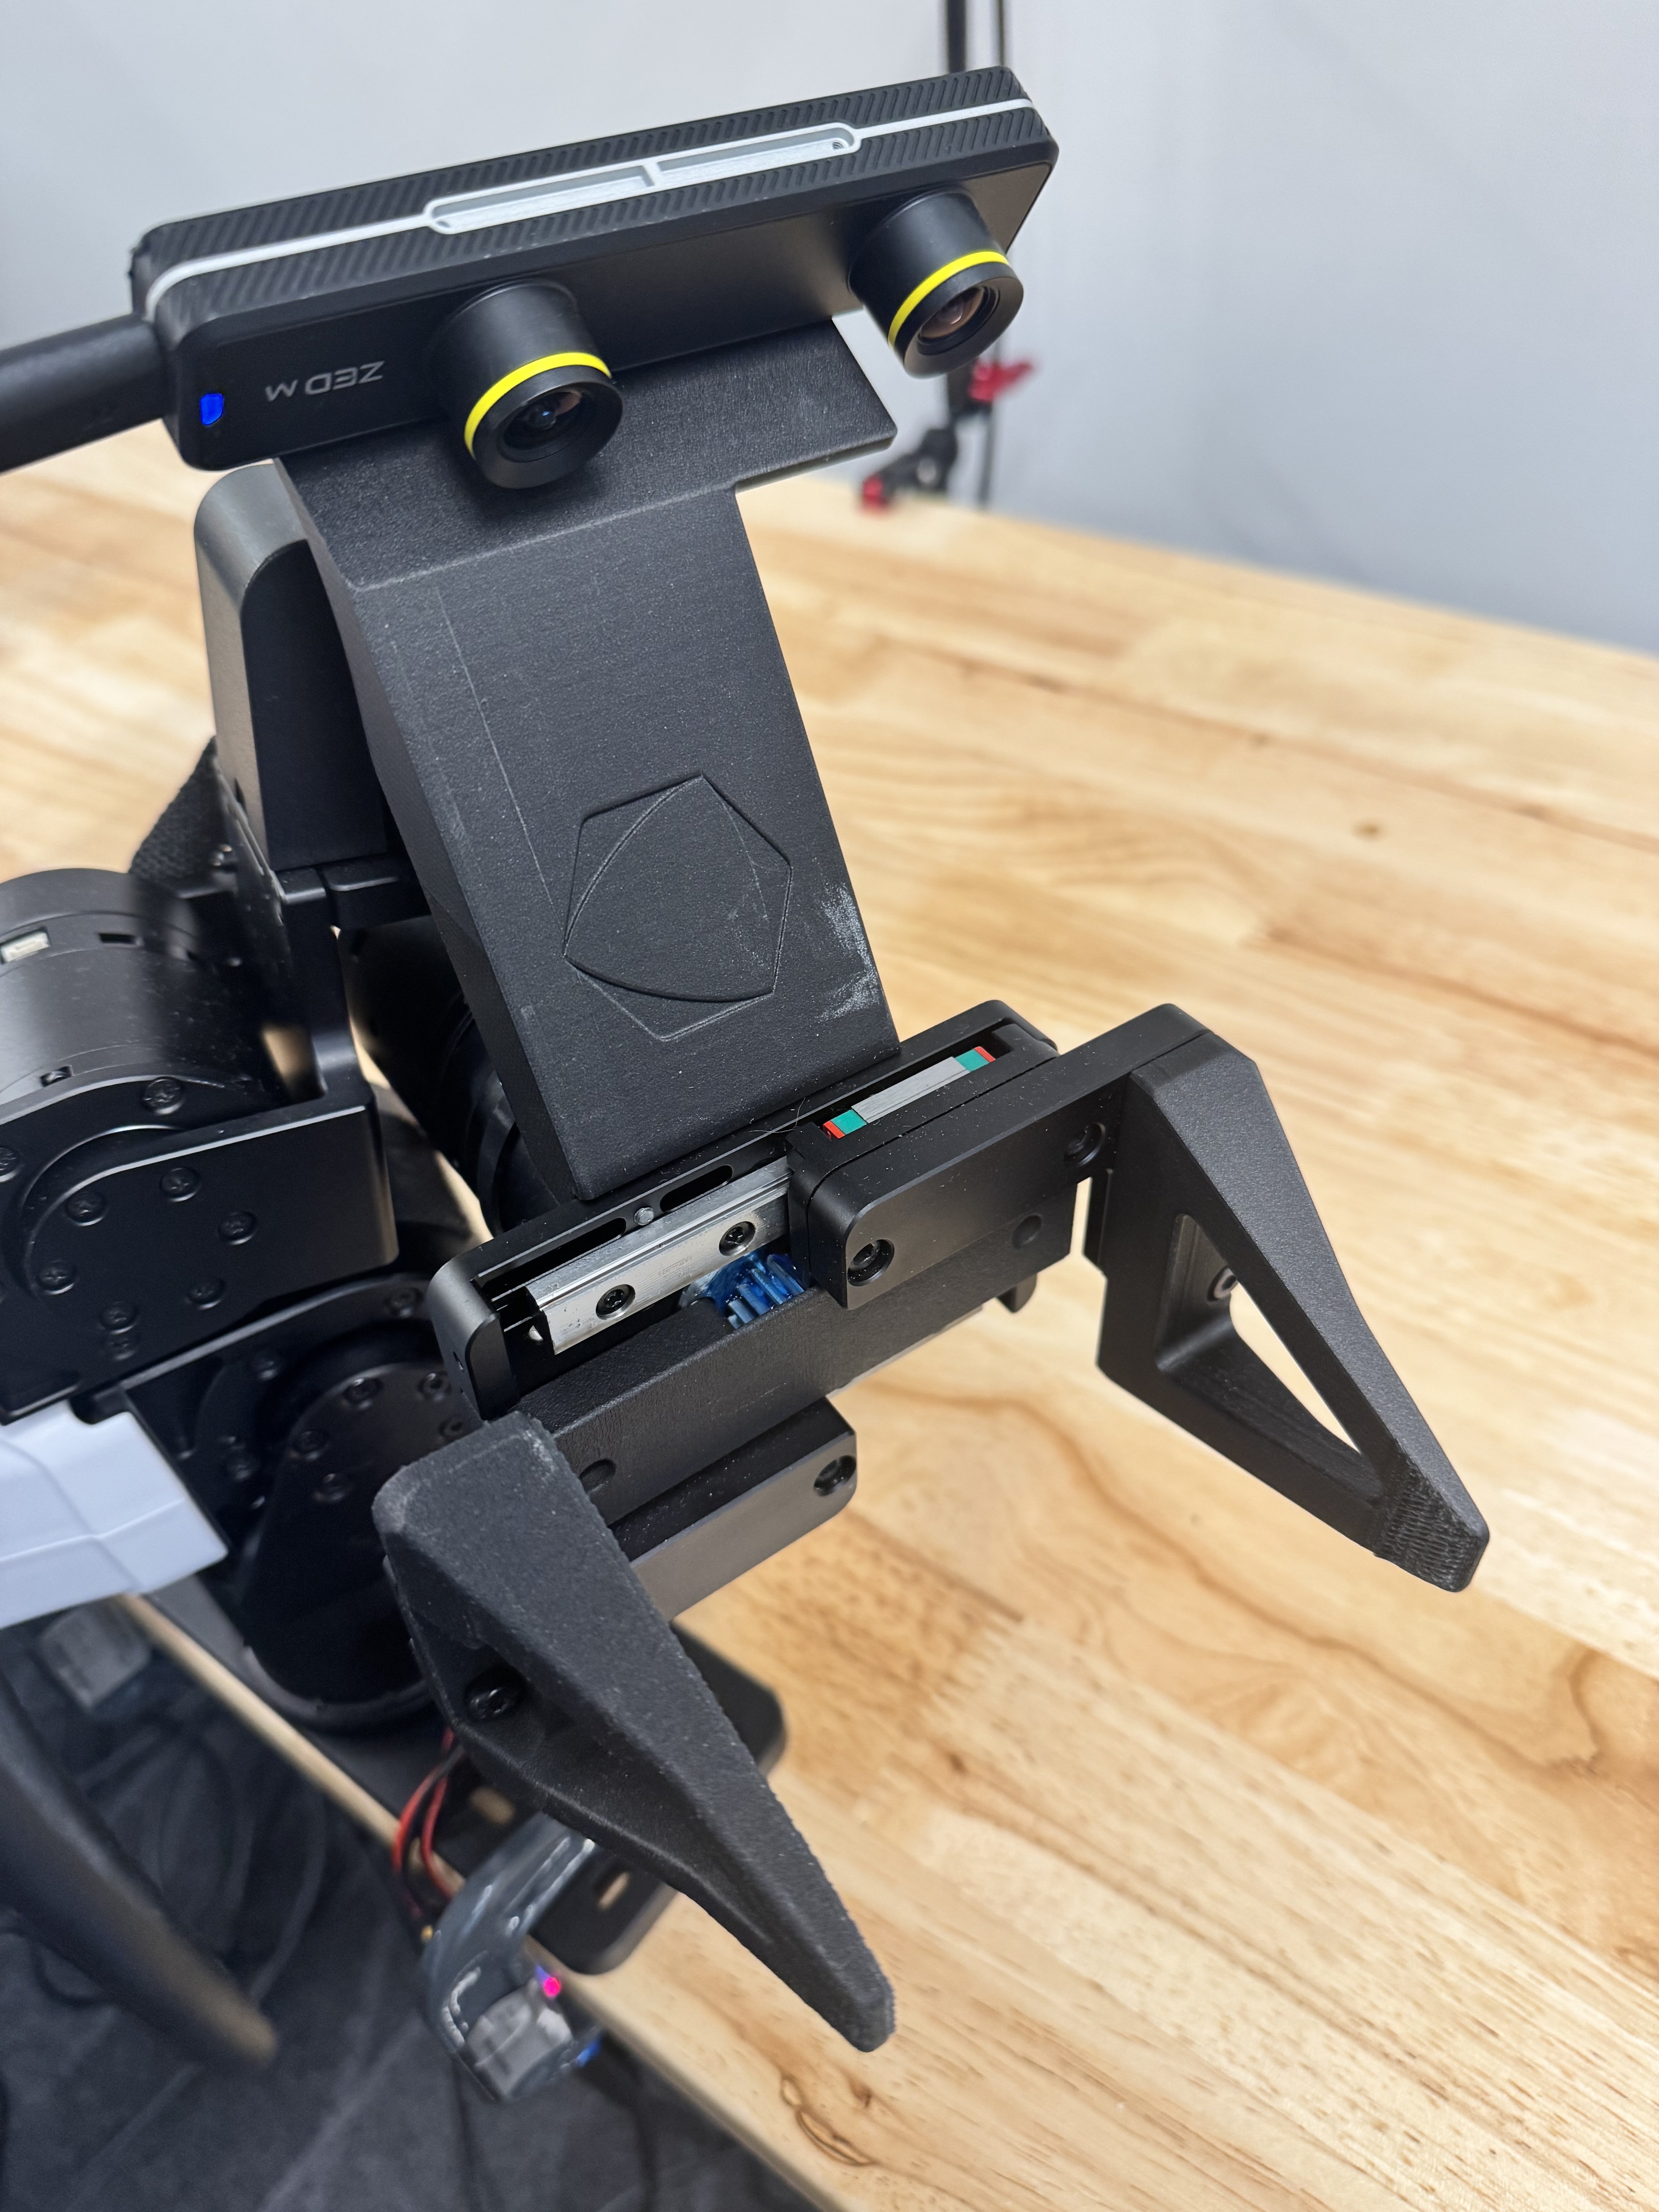
ZED Mini cameras are mounted on the follower arm wrist links via 3D-printed mounts ([left](https://tri-ml.github.io/raiden/assets/zed_mounter_left.STL), [right](https://tri-ml.github.io/raiden/assets/zed_mounter_right.STL)). The ZED 2i is used as a fixed overhead or scene camera. Any Intel RealSense D400-series camera can be used as an alternative wrist or scene camera. The D405 in particular is well-suited for wrist mounting due to its compact form factor and close-range depth optimization.
!!! note "Right wrist ZED Mini orientation"
The ZED Mini on the **right wrist** must be mounted **upside down**.
!!! note "RealSense bag file size"
RealSense cameras record to `.bag` files at 640×480 BGR8. The file size is
roughly **500 MB–1 GB per camera per 10 seconds**. See [Recording](recording.md#realsense-bag-file-size)
for mitigations.
!!! warning "Prefer ZED cameras for dynamic tasks"
For tasks involving fast robot motion, **ZED cameras are strongly recommended
over RealSense**. RealSense cameras have synchronization limitations that can
cause misalignment with other cameras:
- **Timestamp reliability** — `global_time_enabled` is inconsistently supported
across D4xx firmware versions. When unsupported, the SDK reports
hardware-relative timestamps (milliseconds since device boot) instead of
wall-clock time. Raiden measures a clock offset at recording start to
compensate, but this is only an approximation.
- **Frame extraction** — The RealSense SDK pre-buffers frames during bag
playback. If the pipeline queue is drained to fetch the latest frame (as is
appropriate for live preview), every other buffered frame is silently
discarded, halving the apparent FPS. Raiden works around this by disabling
queue draining during playback.
ZED timestamps (`sl.TIME_REFERENCE.IMAGE`) are wall-clock Unix nanoseconds,
consistent across all ZED cameras and with the robot controller clock, making
multi-camera alignment straightforward. Use RealSense cameras only where their
close-range depth quality is the primary requirement and motion is limited.
## Fin-ray gripper
Raiden supports fin-ray compliant grippers, which conform to object shapes for robust and gentle grasping. The gripper consists of a 3D-printed adapter that mounts to the YAM arm end-effector and interchangeable fin-ray fingers.
### Parts
| Part | File | Material | Notes |
|---|---|---|---|
| Adapter (mounter) | [finray_adapter.STL](https://tri-ml.github.io/raiden/assets/finray_adapter.STL) | [PA6-CF](https://us.store.bambulab.com/products/pa6-cf) | Mounts to the YAM end-effector |
| Short finger | [finray_short.STL](https://tri-ml.github.io/raiden/assets/finray_short.STL) | [TPU 95A HF](https://us.store.bambulab.com/products/tpu-95a-hf) | **Tested and recommended** |
| Long finger | [finray_long.STL](https://tri-ml.github.io/raiden/assets/finray_long.STL) | [TPU 95A HF](https://us.store.bambulab.com/products/tpu-95a-hf) | Available but not fully tested |
You will also need the following parts:
| Component | Link (US) | Notes |
|---|---|---|
| M3×0.8mm screws | [McMaster-Carr 91292A112](https://www.mcmaster.com/91292A112/) | 1 pack of 100 |
| Female hex standoffs | [McMaster-Carr 94868A713](https://www.mcmaster.com/94868A713/) | 4–8 (single–bimanual) |
| Friction sheet | [Amazon](https://a.co/d/0iTBIF98) | Applied to finger contact surface for better grip |
### Printing
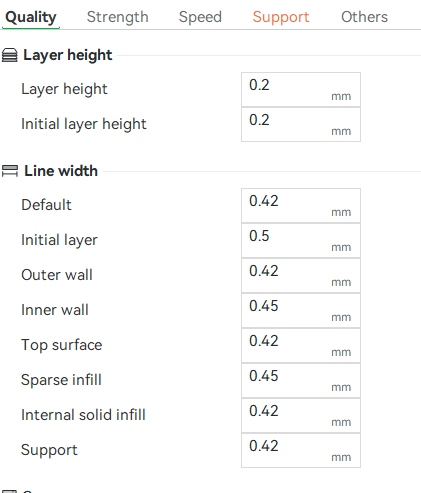
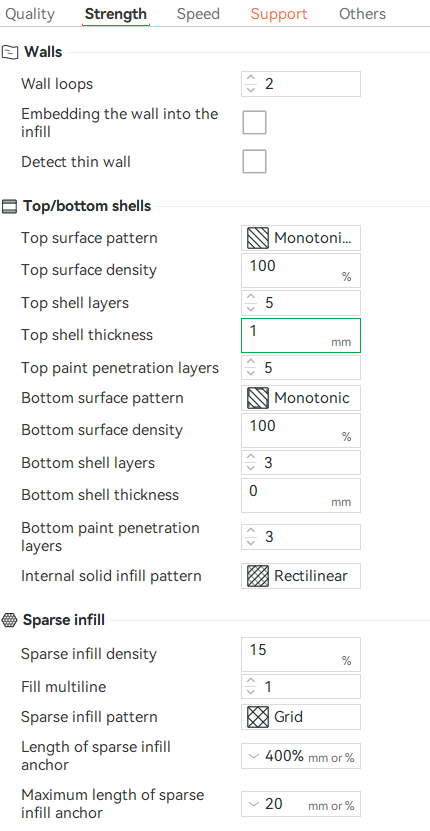
We have only tested printing with a Bambu printer. Other printers may work, but are not tested. Print using the default profile with **support enabled**. Use the material assignments above (PA6-CF for the adapter, TPU 95A HF for the fingers).
Bambu slicer settings:
## SpaceMouse setup
SpaceMouse devices are identified by their `hidraw` path (e.g. `/dev/hidraw6`).
To find the correct paths, run:
```bash
rd list_devices
```
This lists all connected SpaceMouse devices with their paths. Once identified,
save them to `~/.config/raiden/spacemouse.json`:
```json
{
"path_r": "/dev/hidraw7",
"path_l": "/dev/hidraw6"
}
```
`rd teleop` and `rd record` pick up the paths from this file automatically.
You can still override them on the command line with `--spacemouse-path-r` and
`--spacemouse-path-l`.
## Soft E-Stop Foot Switch
See [Safety](safety.md) for setup and usage.
## CAN bus setup
Each YAM arm communicates over its own CAN interface. Raiden expects the
interfaces to be named as follows:
| Interface name | Arm |
|---|---|
| `can_follower_r` | Right follower arm |
| `can_follower_l` | Left follower arm |
| `can_leader_r` | Right leader arm |
| `can_leader_l` | Left leader arm |
These names must be set as **persistent** CAN interface aliases. In a
**single-arm setup**, only `can_follower_l` and `can_leader_l` are needed —
the single arm is always treated as the left arm. Follow the
i2rt guide to assign them:
[Setting a persistent ID for a socket CAN interface](https://github.com/i2rt-robotics/i2rt/blob/7b6d5016f05ca63f9ef0185b7143e63f2c7a5708/docs/getting-started/hardware-setup.md#persistent-can-ids).
### Identifying each arm
Because all arms look identical on the bus, **connect and name them one at a
time**:
1. Disconnect all arms.
2. Connect a single arm.
3. Run `ip link show` to see which `can*` interface appeared.
4. Assign the persistent name for that arm (e.g. `can_follower_l`) following
the i2rt guide above.
5. Disconnect that arm and repeat for the next one.
This ensures each physical arm is unambiguously mapped to its interface name
before running Raiden.
### Bringing interfaces up
After each reboot, bring all CAN interfaces up with:
```bash
rd reset_can
```
This detects every `can*` interface visible to the OS, brings each one down,
then back up at 1 Mbit/s. It calls `sudo ip link set` internally, so you may
be prompted for your password.
To reset specific interfaces only:
```bash
rd reset_can --interfaces can_follower_l can_follower_r
```
To use a different bitrate:
```bash
rd reset_can --bitrate 500000
```